• Email
  • Facebook
  • Instagram
  • Pinterest
  • Twitter
  • YouTube

Eileen Hull

Three dimensional art... with heart

  • Home
  • About
  • Products
    • Sizzix
  • The Paper Trail
  • Facebook Live
  • Project Videos
  • Blog
  • Videos and Press

Sizzix Bloom Journal

15 May
I had so much fun creating this Sizzix Bloom Journal! This project was originally published over on A Vintage Journey. They invited me be a Guest Creative Guide to celebrate their third birthday. And you know I am always up for a party 🙂 I decided to share it here too since I really like how it came out.

Unfortunately I do not have a lot of process photos as I got caught up in the fun of creating and forgot to snap photos along the way.

The Bloom Journal I made was a fun experiment. My friend Ann Butler has a line of iridescent paints with Earth Safe Finishes and I had been waiting for a chance to use them. I decided to make a book using my new Sizzix Journal die, being released any day now! This is already one of my favorite dies because it is a blank canvas just waiting for you to put your style on it.

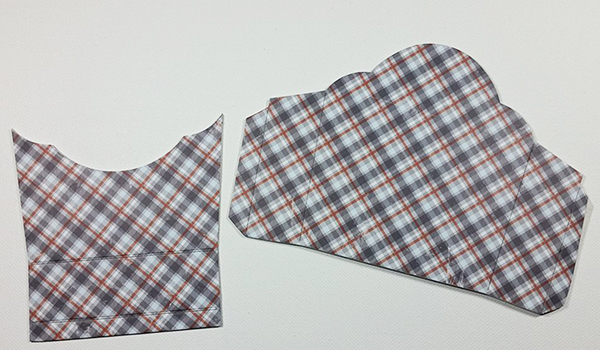
I started by running the die through the machine with mat board twice- cutting two covers, latches, labels and tabs (I wound up only using the covers on this project). The Journal is a ScoreBoards die which means it is specially designed to cut and score thick material like matboard and chipboard- anything up to 1/16”. I love mat board because it is so sturdy and the smooth surface accepts inks, paints, and mists really well.

I laid my two covers out and treated the surface of the mat board with Earth Safe Finishes Gel Medium. On top of that I dry brushed Lagoon and Limelight Iridescents on both sides of the covers. Off to a good start! Then I spread some Wendy Vecchi white embossing paste over a floral Prima stencil and let that dry.

While the covers were drying, I decided to make my 3D flowers. I used the Heart & Soul Flower, Spring Leaves and new Stitchy Flowers and cut stacks of them from crinoline, coffee filters and felt. I layered them and secured the centers with a brad. Then starting with the inside petals, I scrunched each one into the flower center until all were wadded up and looking quite unremarkable. Then for the fun- fluffing! Next thing I knew there were a bunch of nice fluffy flowers. I colored some of them with sprays I had made from my Clearsnap ColorBox Blends ink and left a couple just plain white. I also inked the leaves and set them aside.
Next I added gold Deco Art Metallic Lustre Wax Finish on top of the Journal cover, using a piece of dry wall tape as a stencil. I dusted some gold metallic powder on top of the whole cover with a paintbrush to make it sparkle. (We found this gigantic jar when we were going through my mother-in-law’s house after she died. I have no idea what it was meant to be used for).
Once the covers were dry, I glued the center tabs together to assemble the Journal cover, using binder clips to keep them together as they dried. (You could also stitch the spine together or use hot glue.)
I decided to add a twisted wire word, and since it’s spring, “bloom” seemed appropriate. I used my Sizzix Twist & Style tool to twist some soft aluminum wire into a perfect coil, them shaped the word to fit across the Journal. It was stapled to the front of the Journal with the Tiny Attacher.

I glued some white cheesecloth down and then placed the flowers on the bottom of the Journal.

Additional elements were needed though…

Lately I have been finding mismatched vintage earrings and bracelets in thrift stores and adding them to my boxes and books. So I went to a jar of bling I had recently acquired and added a gold leaf pin. I noticed that a few rhinestones were missing- no matter… there were extra crystal beads in the jar too. I glued the crystals over the gaps and it looked fine. I also found a library file card for an artistic work called “Wild Roses”. It seemed to be the perfect addition along with two gold letter “r’s” (for roses!).

My friend Jenny Marples had used some kraft packing paper to create inserts for a Journal she had made and I really liked how that looked. So thanks Jenny- I borrowed your idea 🙂 I crumpled a large sheet of brown kraft paper, smoothed it out and folded and cut the sheet into pages 8 1/2” x 8”. I folded the signature in half and sewed down the center on my sewing machine.

Now it was time to add the gold metallic elastic to the book. I wove it from the inside of the cover through the top left hole, then through the top right hole, brought it down through the bottom right hole and through the bottom left hole, and formed a rectangle with the elastic. The elastic should be tied so there is enough tension to keep the inserts in the book but not so tight there is no give.

The pages have such a cool feel to them as you page through the book! I haven’t had time to write in it yet, but my plan is to gesso the pages and use them to practice my lettering in.
Thanks for stopping by! Please join me for Facebook Live at Eileen Hull Designs on Tuesdays at 6 pm EST and Thursday when we talk journals at 4 pm!

Categories:
3D Art, Guest Tutorials, Inspiration Team, Scoreboards, Sizzix

How to Assemble the Sizzix Journal

24 Apr

Just a quick post to show how to assemble the Sizzix Journal die and create inserts. There has been so much interest and chat about this versatile die, I thought it might be good to do a post and keep all of the resources in one spot. Thanks so much for your interest!

Here’s what the Journal die packaging looks like:

661906_Journal

The Journal is a ScoreBoards die, designed to cut and score thick material like matboard and chipboard, forming a rigid cover for your book! Matboard is the perfect blank canvas- add paint, ink, stamps, sprays, texture paste, stencils, buttons, beads, and more. You can also cut it from paper, fabric, felt, paper leather, metal or combinations of these materials. You can run the matboard through embossing folders too, creating a rich dimensional cover.

One of the things I love about this die is that it’s so easy to put together. And once you make one… well, you’ll see- they are addicting! There are so many ways to use this die- make art journals, planners, for a special occasion, photos, baby book, guest book, wedding journal, junk journals, and traveler’s notebook. It’s your Journal- decorate it as you’d like in the colors, style and materials you’d like!

In this Facebook Live video, I show how to assemble the Sizzix Journal, after looking at some amazing samples from the Inspiration Team. Please watch and see how easy it is! Skip ahead to about minute 30:- for actual assembly.

The Journal measures 8 3/4″ x 4 1/2″ when assembled. Three to four inserts may be added to the book. Watch here to see how to make Journal inserts and how to thread the elastic though the spine to keep the inserts in place:

NOTE- I admit I am not an expert book maker. Here’s a quick tutorial from my friend Pam Keravuori.

Signatures

The story I’ve heard suggests that the sections, or “signatures”, which are the sets of pages sewn into a book, supposedly got their name from monks.  When monks finished hand-writing their section of a book, they signed it and that section became known as a signature. Now it means sheets of paper, or “folios”, stacked and folded in half.  A signature may be one folio, or one sheet of paper folded in half to make four pages, but generally it is two or more sheets/folios (and sometimes more folds).

The Pamphlet Stitch

The pamphlet stitch is probably the simplest and most popular binding technique for notebook inserts like ours, because you can stitch the pages and the cover of the signature at the same time.  You can use 3 or more holes along the fold, but the trick is to start and finish on the same side (whether inside or outside) and have both ends of the twine end up together at the same hole to tie off.  Usually this means having one long stitch go over (rather than through) the center hole.  
So, for a 3-hole pamphlet stitch, your needle would go through the center hole from inside to outside (or reverse), then through one end hole from outside to inside, then across the center hole to the other end hole, going through from inside to outside, then back through the center hole from outside to inside.  Both ends of your thread would now be on the inside at the center hole, ready to tie around and secure the long stitch that crossed over the center hole.
Alternatively, if you stitch with a back stitch and wind up with one thread end inside and one thread end outside, you can make a loop knot to anchor the thread around the earlier stitch at the hole before going through to join the other thread end.  This is called a saddle stitch binding.
I usually use 5+ holes for my pamphlet stitch because I think it makes the spine sturdier and puts less pressure on each hole (to avoid tearing).  More holes also help keep smaller sized papers in place, so they don’t slant or settle to the bottom.  As I start stitching, I leave a thread tail long enough to reach near the bottom of the signature, where I hold onto it against the paper until the 2nd or 3rd stitch, when it becomes secure (without a knot until the tying off).  General advice is to always pull your thread parallel to the spine in the direction you’re stitching, since pulling the thread straight out from the spine tends to tear the holes.
Please follow me on Facebook at Eileen Hull Designs and watch for extra LIVE shows in honor of this new Heartfelt Sizzix release!  I hope you have enjoyed seeing how to assemble the Sizzix Journal and will consider getting one for yourself!
If you would like to purchase a die, there are a few left in my Etsy shop!

Categories:
3D Art, Collaborations, Eileen Hull, Eileen Hull Sizzix Dies, Products, Scoreboards, Sizzix, Sizzix Tutorials, Uncategorized
Tags:
Art Journal, Inspiration Team, Journal Die, junk jourrnal, matboard, video tutorial

New Inspiration Team Member!

5 Jan

Today we are super- excited to introduce Mitsyana Wright, our new Inspiration Team member! It turns out she will be going to CHA and we will actually meet in person in just a couple of weeks. 🙂

Mitsyana blogs at Up On Tippy Toes. You will see beautiful projects like this on her blog…

mitsyana-hatpinbook1Here she took the Sizzix Needle Book to make an adorable little notebook. Her style is bright and clean and she has quite the magic touch with ScoreBoards!

mitsyana-wright-teacupbloghop

See how she made this Beautiful Sizzix Teacup here.

th-halloween-traincaseAnd everyone loved this Halloween Train Case!

But my personal favorite might be this Doughnut Holder! I had no idea you could fit a doughnut in there!

donutbox9-1

But then there’s this awesome Passport Book?

pocket-sized-art-journal-1

And the Preppy Train Case…

preppy-train-caseehbloghop1

Mitsyana has a beautiful clean fresh style. Please follow her blog and get to know her. You can also follow on Facebook and Instagram…

Leave a comment and let Mitsyana know which is your favorite project!

Thanks for stopping by…

Categories:
CHA, Eileen Hull, Projects, Scoreboards, Sizzix, Uncategorized
Tags:
Inspiration Team, Mitsyana Wright, new team member

MidCentury Gift Box Set by Christie Troxell

31 Dec

Here’s the last project of 2016- a MidCentury Gift Box Set by Christie Troxell, one of our Guest Designers for December!

Christie blogs at Ritzy Parties – visit her site to see more unique projects and events she has coordinated.

3paper-crafting-paper-flowers-gift-box-eileen-hull-9

She covered the Sizzix Flower Pocket die with coordinated patterned paper to create the Gift Box and added rickrack for a dash of style.5paper-crafting-paper-flowers-gift-box-eileen-hull-21

The Flower Pocket is embellished with a beautiful Pansy flower and jeweled center.

close-paper-crafting-paper-flowers-gift-box-eileen-hull-10

The package that goes inside the pocket is adorned with a paper leaf from the Spring Leaves die. The gift is wrapped in coordinating papers.paper-crafting-paper-flowers-gift-box-eileen-hull-2

This project is a delightful way to start off the New Year- thanks for sharing this awesome MidCentury Gift Box Set, Christie!

And we have lots more in store for you in 2017…

Please follow my Paper Trail adventures! I leave in less than two weeks for the Craft & Hobby Association show in Phoenix AZ with vintage trailer Scotty in tow. Scotty will be parked on the trade show floor again this year. The journey there and back is bound to be another adventure and I hope to sprinkle in some Facebook Live videos along the way and, of course, at the show. Get a sneak peek of my new Sizzix collection coming out in March… it’s new dies and a new product that is my first attempt in a new direction!

We will be starting a new feature on the blog this coming Monday. There will be a chance for you to share what you have been working on too so we hope you will join us.

Last but not least we have an announcement coming soon about the Eileen Hull Inspiration Team…

Follow me on social media and journey along the Paper Trail on Facebook, Instagram and Twitter.

Health, happiness and peace to you in 2017, friends!

Categories:
Projects, Scoreboards, Sizzix, Uncategorized
Tags:
Christie Troxell, Gift Packaging, Sizzix dies

Candy Cane Caddy by Mitsyana Wright

22 Dec

Merry Christmas friends. Here’s a fabulous project for you- the Candy Cane Caddy by Mitsyana Wright! She shows how the Sizzix Caddy die can be used in two fun ways.

Mitsyana and I met a couple of months ago as we were working on our collaboration with DCWV. Her work is fantastic and she rocks those ScoreBoards dies! She graciously agreed to create a holiday project for us so check out the awesome tutorial below…

Candy Cane Caddy

Happy Holidays Crafty Friends! I am super excited to be guest designing for Eileen Hull Designs today!!

I love the versatility of her dies and how many of her designs are multifunctional. Here, I’ve made a candy cane caddy that also doubles as a Christmas ornament!

candy-cane-caddy2

For today’s project, I used Eileen Hull’s Caddy Die by Sizzix.

657123_3

This is a steel rule XL Scoreboard die. You will need to use the Sizzix Big Shot Extended Cutting Pads in order to use these dies.

candy-cane-caddy3

I started my project by first cutting down my 12” x 12” materials (chipboard and patterned paper), down to a workable 6” x 12” size so I can die cut them.

I didn’t want the entire caddy to be just one patterned paper. So, I trimmed down my 6” X 12” sheet into smaller pieces (4”x 6” and 6”x 8”) to cover just one of the panel pieces each.

Then, layered my chipboard piece over the patterned papers and ran all the material through my die-cut machine at the same time.

It cut through all the layers with ease!!

candy-cane-caddy4

I trimmed off the “tucking” flap pieces of the bottom box portion (for the patterned paper only)… you will not see these pieces so there’s no need to add them.

Then, I cut apart this cut out on the crease lines.

Next, I ran my papers through my adhesive machine and attached them to their coordinating chipboard pieces.

I also cut an extra back piece out of the same black patterned paper to cover the back of the caddy, ran it through my adhesive machine, and attached it to the backside of the caddy’s back wall.

candy-cane-caddy5

I added clear adhesive to the bare flaps and adhered them to the back panel.

candy-cane-caddy6

Then, I used more clear adhesive to attach a few embellishments and to trim with ribbons.

candy-cane-caddy

You can fill with your favorite holiday treats…

candy-cane-caddy1

Ready to gift as treats…

OR

candy-cane-caddy2

Because it has the wonderful handle built in…

Hang it on the tree as festive decor!!

I hope you enjoyed my project for today!! I am very honored to be able to guest design for the Eileen Hull Design Team.

HAPPY HOLIDAYS, EVERYONE!!

~ Mitsyana Wright (Up On Tippy Toes)


Thanks for sharing your ornament/treat box with us Mitsyana!

And thanks to all of you for stopping by to visit at this busy time of year. Happy Holidays from me, my awesome IT Coordinator Amy Bowerman, and the Inspiration Team! We are looking forward to sharing another year of awesome creativity with you.

Categories:
Holiday Crafts, Scoreboards, Sizzix, Uncategorized
Tags:
Art with Heart, Candy Cane Caddy, Guest Designer, Mitsyana Wright, Sizzix

Sizzix Holiday Gift Wrap

7 Dec

While our Inspiration Team Elves are busy making samples for CHA, we are super excited to welcome our talented Guest Designer friends to share their favorite holiday projects with us this month. The first one up is Sizzix Holiday Gift Wrap by my good friend Susie Bentz. Don’t you love how quick and easy this is? And you can make it with only one piece of matboard!

Guest Designer Susie Bentz

Hello!  I was just delighted when Eileen invited me to create a special holiday project to share on her blog this month. It is probably no surprise that my mind immediately went to gift giving.  I find during the holidays that I often want to give a small gift and the biggest dilemma is how to wrap it.  The easiest solution is to use Eileen’s Flower Pocket die!

1a-eillen-hull-sizzix-flower-pocket-die-christmas-gifts-by-susie-bentz-with-authentique-wintery

How to:

I started by covering both sides of a piece of Little Sizzles white mat board with paper from the Authentique Wintery Collection.  I used Therm O Web Easy-Cut adhesive sheets to adhere the paper.  This is an XL Die so you will need to use extended cutting pads.  I wanted the plaid pattern on the outside of the finished box so I placed it face down on the die and ran it through the machine.

2-eileen-hull-pocket-die-authentique-wintery

The pocket is formed from just 2 pieces: the bottom/front piece and the back/sides piece.  Here is a look at the reverse side of the die cuts which was covered in gray paper with a tiny snowflake pattern.

2a-eileen-hull-flower-pocket-die-authentique-wintery

After I bent the die cut at all the scored lines, I applied Therm O Web SuperTape on the tabs.

2b-eileen-hull-flower-pocket-therm-o-web-supertape

I attached the bottom/front piece by centering the tab on the inside bottom of the flower pocket. Here is a view of the backside of the pocket at this point.

2c-eileen-hull-flower-pocket-die-sizzix-authentique-wintery

Next I folded up the front and adhered the side tabs to finish forming the pocket.

2d-eileen-hull-sizzix-flower-pocket-die-authentique-wintery

This sweet little pocket is now holding a pair of gloves and is ready for gifting!

3-authentique-wintery-gift-wrapping-eileen-hull-flower-pocket-die

It was so fast and easy that I created a second pocket and filled it with candies and a gift card!

4-authentique-wintery-eileen-hull-flower-pocket-die-gift-card-holder

By the way, the Flower Pocket fit perfectly inside a clear treat bag I picked up at a local store.

4a-eileen-hull-sizzix-flower-pocket-die-gift-card-holder

Gift giving couldn’t be easier when you have Eileen’s die to help with the wrapping!

7-eileen-hull-sizzix-flower-pocket-die-christmas-gifts-by-susie-bentz-with-authentique-wintery

Supplies:

Sizzix Scoreboards XL Die – Flower Pocket

Sizzix Little Sizzles – 6″ x 13″ Mat Board Pack, 6 White Sheets

Therm O Web iCraft Easy-Cut Adhesive Sheets

Authentique Paper – Wintery Collection

******************************************************************

If you would like to see more of my projects you can check out my blog, My Time to Play, or join me on any of my other social media sites:

  • Facebook
  • Instagram
  • Pinterest
  • Twitter

Thanks for stopping by and I hope you find some time to play today!  Susie

Categories:
Eileen Hull, Holiday Crafts, Projects, Scoreboards, Sizzix, Uncategorized
Tags:
Gift Wrap, Guest Designer, holiday, Susie Bentz

  • « Previous Page
  • 1
  • …
  • 7
  • 8
  • 9
  • 10
  • 11
  • …
  • 17
  • Next Page »

Meet Eileen

I grew up in a big family where there was always an art project in the works. Learning to think creatively has been a huge benefit throughout my life: from thirteen military moves and raising four children to developing product lines for craft manufacturers. Come visit and see a slice of my life...
Read More…

Eileen Hull Creative Team 2025

Sign up for my weekly newsletter!

Join the Eileen Hull Fan Club

Join the Eileen Hull Fan Club

Archives

Categories

-http://bellacraftspublishing.com/gifts-to-die-for-with-eileen-hull

Featured in

Where Women Create BUSINESS Spring 2015

Dollar Tree

Copyright © 2025 · Bloom theme by Restored 316

Copyright © 2025 · Bloom Theme on Genesis Framework · WordPress · Log in