Fall is in the Air House
Hi everyone it’s me, Tonya! If you have been following along you know Eileen is away teaching classes. So today I’m “taking over” the blog to show you how I created this simple Fall is in the Air House!
Creating the House
To start this project, cut two House Ornament Diecut from matboard. Cut the flap off one of the house diecuts on the bottom as seen in the photo below.

Ink an Art Dauber with Butter Chalk Ink from the Cornucopia Chalk Paintbox Inks. This set of inks was used for the whole project including inking both house diecuts. Place the Mandala Art Screen on top of the house diecut and load a spatula with Extra Heavy Gel (Matte) Apply the gel over the art screen. Complete the same steps for second house diecut and let both diecuts dry. This was my first time I ever used extra heavy matte gel and I discovered I absolutely LOVED it!
Next ink Art Daubers with Harvest, Dark Brown and Pumpkin Spice Chalk Inks and randomly ink both house diecuts. Once dry, adhere both house diecuts together and add gems around both sides of the roof.
Decorating the House
I must have been in a crafting zone because I forgot to take photos of the steps of how I put the flower together. YIKES! Cut six flowers and one leaf from crinoline fabric from the Journaling Card, Flowers and Leaves Diecuts. The glass tray was inked with Red Barn and Dark Moss Chalk Inks, and water was added to both inks. Six flowers were placed into the Red Barn and the leaf was placed into the Dark Moss Inks. All diecuts were completely covered before I removed them to dry. The final step for the flower was adhering all together. I added the leaf to the back of the flower before adhering to the corner of the roof.
The tiny chipboard flower I inked with Red Barn. The Watercolor Paper leaf was inked with Mint Chalk Inks. The leaf was added to back and a sequin to the center of flower. I then placed a Foam Pop Dot to the back of the flower and above the window. The house was finished by tying a bow from cording and adding to the side of the roof. I hope you have been following Eileen as she travels and her Inspiration Team as they share their some fun crafting ideas!
Thanks for stopping by, hope your day is wonderful and enjoy creating!
Susie Bentz’s Bee Journal Blog Takeover!
Susie Bentz continuing with the Inspiration Team Blog Takeover! Eileen is still gadding about “across the pond”, crafting away with lots of new friends, so I am having a go on her blog. Today I am sharing a honey bee themed journal I made for my sister using Eileen’s die from Sizzix!
Bee Journal Supplies:
- Sizzix Eileen Hull Scoreboards XL Die, Journal
- Sizzix Little Sizzles Mat Board
- Leisure Arts Diamond Art Kit, Bee
- Therm O Web Eileen Hull Easy Cut Adhesive Sheets 6″ x 12″
- Therm O Web Eileen Hull Red Liner Tape, 1/4″
- Clearsnap Eileen Hull ColorBox Blends Inks – Sunshine, Golden, Nutmeg
- Emerald Creek Eileen Hull Molten Dimensions – Glistening Glass
- Rinea Metallics Foiled Paper Variety Pack
- Sizzix Eileen Hull Textured Impressions embossing folder – Honeycomb
- Marvy Uchida Jewel Picker
- Marvy Uchida Le Pen
- Plaid Mod Podge – Gloss
- Honeycomb stencil
- Black cardstock
- Gesso, modeling paste, elastic, beads, twine, misc. dies
The Cover:
This project started with a lovely honey bee themed Diamond Art Kit from Leisure Arts. The design is printed on a heavyweight canvas type material and the honey bee area has a coating of strong tacky adhesive. I positioned the fabric on a piece of mat board, centering the bee image and then adhering it with Eileen’s Easy Cut Adhesive Sheets. After placing the fabric side down, so that it was facing the Journal die, I cut it using a Big Shot machine.
Because the Diamond Art kit was intended for a beginner the instructions were very clear and easy to follow – very much like a paint by numbers kit! It was fun and relaxing and I completed the design in a couple of hours. 
The shine off of those rhinestones is really eye catching!
At this point I began to alter the background with gesso, stencils, modeling paste and Eileen’s ColorBox Blends inks.
I used Sunshine, Golden and Nutmeg inks, blending and playing until I was happy with the color. Next I sprinkled on Eileen’s Glistening Glass Molten Dimensions from Emerald Creek. I had to be careful with my heat gun because if I got too close to the rhinestones they started to melt!
The Diamond Art Honey Bee is meant to be framed and hung on a wall, not handled on a daily basis. I added a top coat of Mod Podge to protect the design. I chose the Gloss formula because I didn’t want to lose the amazing shine!
Assembly:
For the back of the journal I covered mat board with Gold Rinea Foil paper. I die cut the cover then used Eileen’s Honeycomb Textured Impressions embossing folder. Because the journal cover is longer than the embossing folder I had to run it through a second time. I flipped the folder to the other end of the cover and matched/ overlapped the design.
I used Eileen’s Red Line tape on the spine to hold the cover together.
Here’s a peek at the inside! I stenciled a honeycomb design and strung black elastic to hold the signatures.
Finally I added a dangle of fun beads on the spine!
The Signatures:
There are coordinating signatures on the inside featuring die cut Rinea Foil paper. I actually created an etched glass element for one of the covers! (you can find a quick tutorial HERE) 
Thanks for stopping by and I hope you find some time to play today! Susie
You are invited to join Eileen on her twice weekly Facebook Live shows at Eileen Hull Designs– Tuesdays at 6:00 pm EST and Thursdays at 4:00 pm EST. Become a member of the Eileen Hull Fan Club- a friendly, talented and encouraging community of crafty folks that you will want to meet. Join on Facebook and don’t forget to answer the questions! You can also find Eileen on Facebook, Instagram and Pinterest.
Julia Aston’s Blog Takeover!
While Eileen’s traveling and crafting in Great Britain, some of us are taking over the blog to keep you inspired while she is away! So today, here’s Julia Aston‘s Blog Takeover!
I’m one of Eileen’s Inspiration Team members and I’m sharing a book I made for my grandnephew, Landon, to record books that he has read on the pages inside. I had made one for his sister, Mila, and to my surprise, he wanted one as well!
I made the book using Eileen’s Notebook Die
I die cut the pieces out of white chipboard. Then I smooshed the covers by rubbing Ranger Distress Twisted Cintrol, Gathered Twigs and Hickory Smoke onto my craft mat (one at a time). Then I spritzed with water and rubbed the covers onto the mat. I did this until I was happy with the coverage and colors.
I punched 2 holes at the top and bottom of the binding. I also cut holes in the center of pages I cut using Eileen’s Passport Die.
I threaded black elastic cord through the center of each signature (I made 2) and knotted them on the outside binding.
I looped a silver elastic tassel through the two black cords and used this as a closure for the book.
Supplies: Notebook Die, Passport Die, Eileen Hull/Sizzix, dinosaur stickers – Michaels, Stamps: Our Story – My Favorite Stamps (old set), Story of Me – Clear Art Stamps (old set)
I hope I have inspired you to make your own little notebook!
Julia
Note: I have never used WordPress – so I hope this post looks halfway decent!!
You are invited to join Eileen on her twice weekly Facebook Live shows at Eileen Hull Designs– Tuesdays at 6:00 pm EST and Thursdays at 4:00 pm EST. Become a member of the Eileen Hull Fan Club- a friendly, talented and encouraging community of crafty folks that you will want to meet. Join on Facebook and don’t forget to answer the questions! You can also find Eileen on Facebook, Instagram and Pinterest.
Pam Bray Takeover
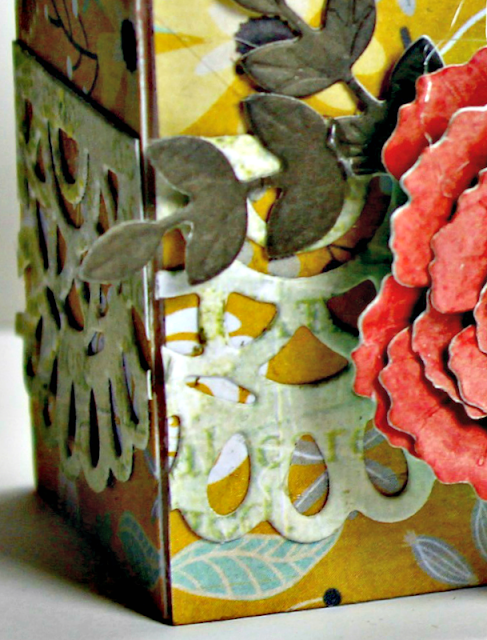
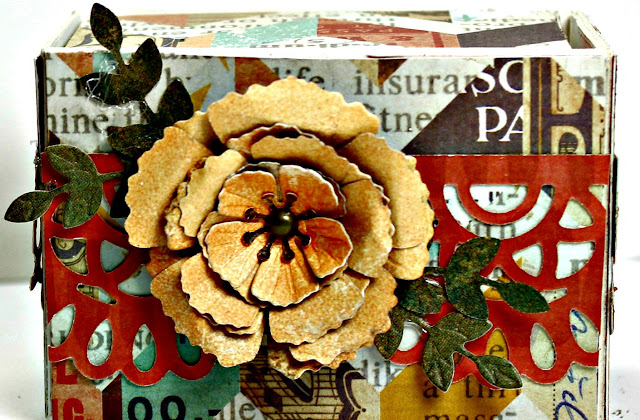
Hi everyone- I’m here for the Pam Bray Takeover! Eileen is so busy packing up for her UK trip, she will never notice that I am sneaking on here. Today I am sharing this fun Sizzix Stacking Drawers project!

Time to think about Fall….Woot! Woot!!
Supplies:
Diamond Press Lace Border Die
Flower Die
Xyron Creative Station Lite with Permanent Adhesive
Fall Pattern Paper Collection
Small Brads
How about creating a few of Eileen Hull’s Stacking Drawer Boxes from Sizzix using your favorite fall collection along with Xyron Creative Station Lite with Permanent Adhesive.
Add brad to center and adhere to top of box
Die cut leaves; adhere around flowers.
Fill with your favorite candy, gift card, note, mini album, etc.
Enjoy! Pam
You are invited to join Eileen on her twice weekly Facebook Live shows at Eileen Hull Designs– Tuesdays at 6:00 pm EST and Thursdays at 4:00 pm EST. Become a member of the Eileen Hull Fan Club- a friendly, talented and encouraging community of crafty folks that you will want to meet. Join on Facebook and don’t forget to answer the questions! You can also find Eileen on Facebook, Instagram and Pinterest.
Summer Magic by Eileen Hull Inspiration Team!
Hi everyone- hope you are having a fantastic August! Here’s some summer magic by Eileen Hull Inspiration Team to keep you thinking and creating.
Books, a Wreath and cool Gift Pockets
 Pam Bray never runs out of ways to decorate books! Today she’s sharing this adorable Best Friends Scholastic Wrapped Journal using vintage-y Authentique papers!

Don’t you love this gorgeous Seashell Journal by Tonya Trantham? She used the Notebook die, Journaling Words and Clearsnap inks to create the cover of this pretty book.

Lisa Hoel created a Beachy Wreath using Blends inks and Emerald Creek embossing powders – I love the soft colors and textures! Totally stealing this idea to make one for our beach house!

Jenny Marples made this stunning mixed media Floral Collage Gift Folder using the Gift Card Folder and her magical inking skills.

Susie Bentz created this gorgeous stenciled New Home Gift Card Folder and matching card base! She always has the perfect stamps to decorate. These are from the Project Bin!
Check out my Facebook Live video from last week with a follow up idea for using the Gift Card Folder with paper.
As always I invite you to join me on my twice weekly Facebook Live shows at Eileen Hull Designs– Tuesdays at 6:00 pm EST and Thursdays at 4:00 pm EST. Become a member of the Eileen Hull Fan Club- a friendly, talented and encouraging community of crafty folks that you will want to meet. Join our Facebook group and don’t forget to answer the questions! You can also find me on Facebook, Instagram and Pinterest.
I hope you liked seeing the Summer Magic by Eileen Hull Inspiration Team! Thanks for stopping by- see you soon!
- « Previous Page
- 1
- …
- 48
- 49
- 50
- 51
- 52
- …
- 190
- Next Page »


